Installing a WordPress theme is a fundamental step in customizing your website’s appearance and functionality. This guide provides detailed, step-by-step instructions to help you install a WordPress theme using various methods, ensuring a seamless experience.
Table of Contents
- Understanding WordPress Themes
- Choosing the Right Theme
- Preparing for Theme Installation
- Method 1: Installing a Theme via the WordPress Dashboard
- Method 2: Uploading a Theme from a .zip File
- Method 3: Installing a Theme via FTP
- Installing Plugins
- Importing Demo Content
- Post-Import Setup
- Customizing Your Theme
- Troubleshooting Common Issues
- Frequently Asked Questions
1. Understanding WordPress Themes
A WordPress theme is a collection of templates and stylesheets that define the appearance and display of a WordPress site. Themes allow users to change the look and functionality of a WordPress website without altering the core code or site content.
2. Choosing the Right Theme
Before diving into theme installation, choose a suitable theme from the marketplace catalog. Use the filter options to narrow your search based on design, functionality, or niche requirements.
Selecting the appropriate theme is crucial for your website’s success. Consider the following factors:
- Purpose and Functionality: Ensure the theme aligns with your website’s goals and offers the necessary features.
- Design and Aesthetics: Choose a theme that reflects your brand’s identity and appeals to your target audience.
- Responsiveness: The theme should be mobile-friendly and look good on all devices.
- Customization Options: Look for themes that allow easy customization without requiring extensive coding knowledge.
- Performance: A well-coded theme will load faster, improving user experience and SEO.
- Support and Updates: Choose themes that are regularly updated and offer support.
3. Preparing for Theme Installation
Before installing a new theme:
- Backup Your Website: Use plugins like UpdraftPlus or BackWPup to create a complete backup.
- Check Theme Compatibility: Ensure the theme is compatible with your WordPress version and essential plugins.
- Review Theme Documentation: Familiarize yourself with the theme’s features and installation instructions.
4. Method 1: Installing a Theme via the WordPress Dashboard
This method is suitable for themes available in the WordPress Theme Directory.
- Access the Dashboard: Log in to your WordPress admin area.
- Navigate to Themes: Go to Appearance > Themes.
- Add New Theme: Click the Add New button at the top.
- Search for a Theme: Use the search bar to find your desired theme.
- Preview and Install: Hover over the theme thumbnail, click Preview to see a live demo, and click Install to add the theme.
- Activate the Theme: After installation, click Activate to apply the theme to your site.
5. Method 2: Uploading a Theme from a .zip File
Use this method for premium or custom themes downloaded as a .zip file.
1. Access the Dashboard: Log in to your WordPress admin area.

2. Navigate to Themes: Go to Appearance > Themes.

3. Add New Theme: Click the Add New button.

4. Upload Theme: Click the Upload Theme button at the top.

5. Choose File: Click Choose File, select the .zip file from your computer, and click Install Now.

6. Activate the Theme: Once installed, click Activate.

6. Method 3: Installing a Theme via FTP
This method is for advanced users comfortable with using FTP clients.
- Extract Theme Files: Unzip the theme .zip file on your computer.
- Connect to Your Server: Use an FTP client like FileZilla to connect to your web server.
- Navigate to Themes Directory: Go to
/wp-content/themes/directory. - Upload Theme Folder: Upload the extracted theme folder into the
/themes/directory. - Activate the Theme: After uploading, log in to your WordPress dashboard, go to Appearance > Themes, and click Activate under the new theme.
7. Installing Plugins
After activation:
1. Install Recommended Plugins: Some themes suggest plugins to enhance functionality; consider installing them.


Don’t forget to activate all the plugins.

2. Customize Settings: Go to Appearance > Customize to adjust site identity, colors, menus, widgets, and more.
3. Set Up Homepage: Configure a static front page or display your latest posts under Settings > Reading.
8. Importing Demo Content
After installing the theme and plugins, your website probably doesn’t look good yet. It’s common for theme developers to offer demo content import right after the theme is installed. If demo content is not provided by the theme developer, you’ll need to manually create pages, navigation menus, and other elements required for the website to function properly. In this case, you can skip ahead to the next section.
Importing demo content can significantly simplify the website setup process. It automatically creates all the necessary pages with predefined sections, blog posts, navigation menus, color schemes, fonts, and images — giving you a ready-made layout to start customizing.
In some cases, even pre-filled content is included, although we always recommend replacing it with your own to ensure your site is unique and relevant to your brand.
One of the most popular methods for importing demo content is through the One Click Demo Import plugin. After installing and activating the theme, you’ll be prompted to install this plugin. Once it’s installed and activated, go to the Import Demo Data section to begin the import process.

You are on the demo content import page.
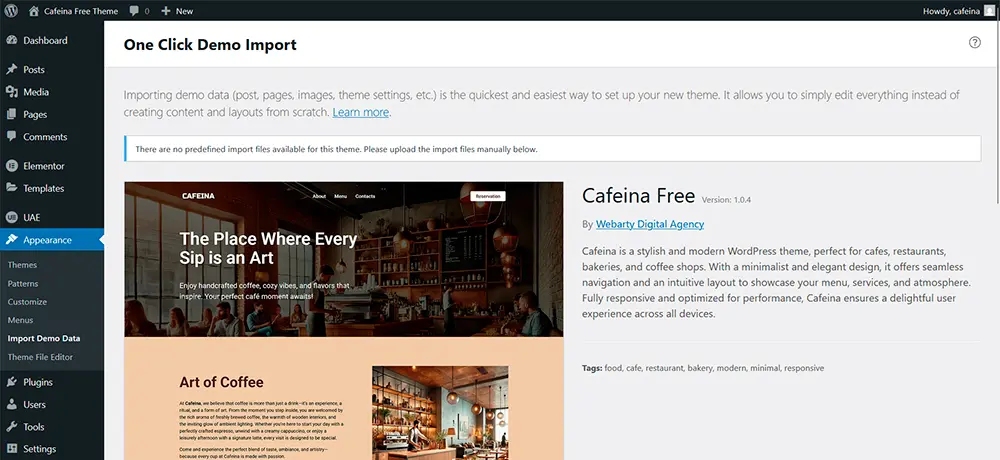
Scroll down to the Manual Demo File Import section. Here, you will be asked to upload several files.
The required import files are usually provided by the theme developer.
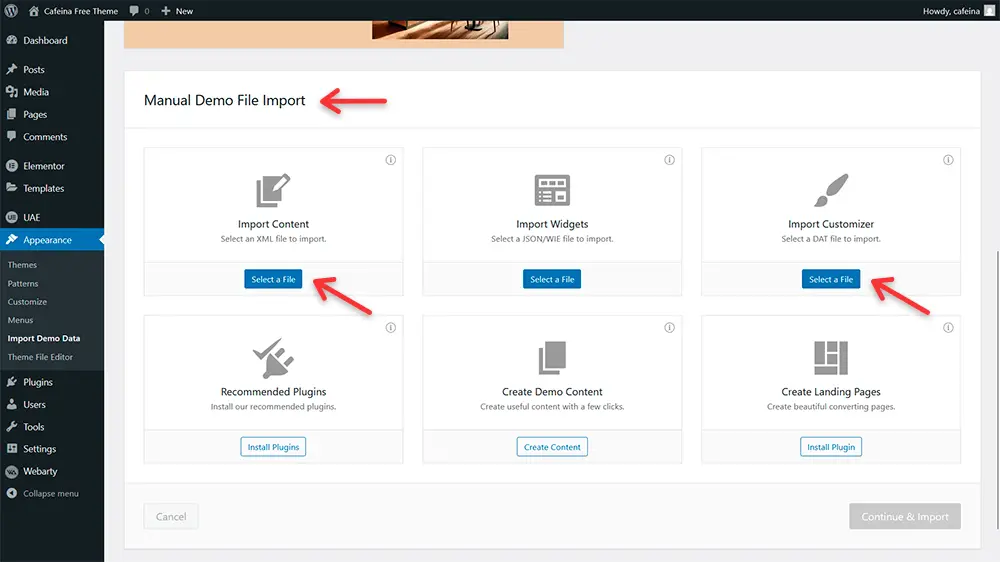
Upload the necessary files using the form on the page (there is a separate field for each file). In the cafeina-free theme, you need to import two files: demo-content.xml and customizer.dat.
They are located in the import directory. Then click Continue & Import.
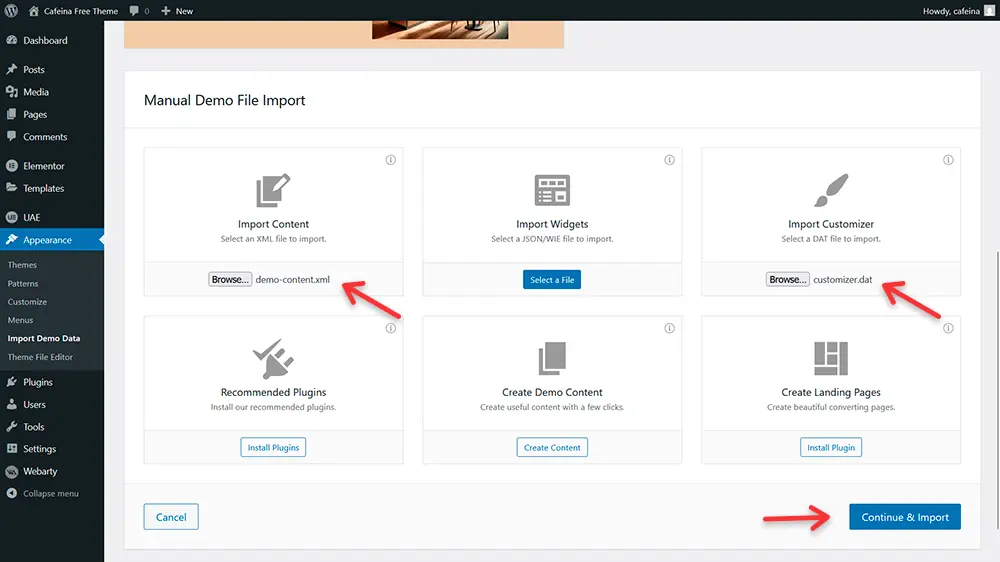
Wait until the content is fully loaded.
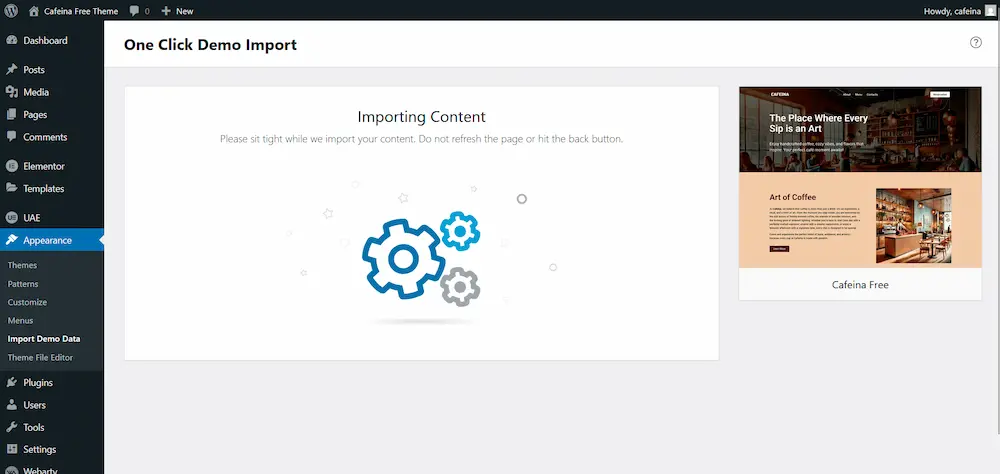
Import Complete!
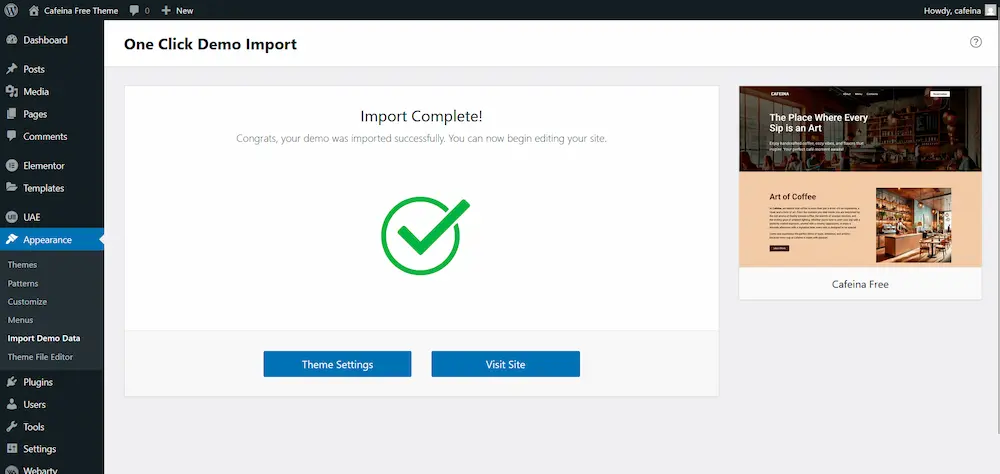
9. Post-Import Setup
The theme is installed and the content has been imported, but the site still looks off. Some small adjustments are still needed.
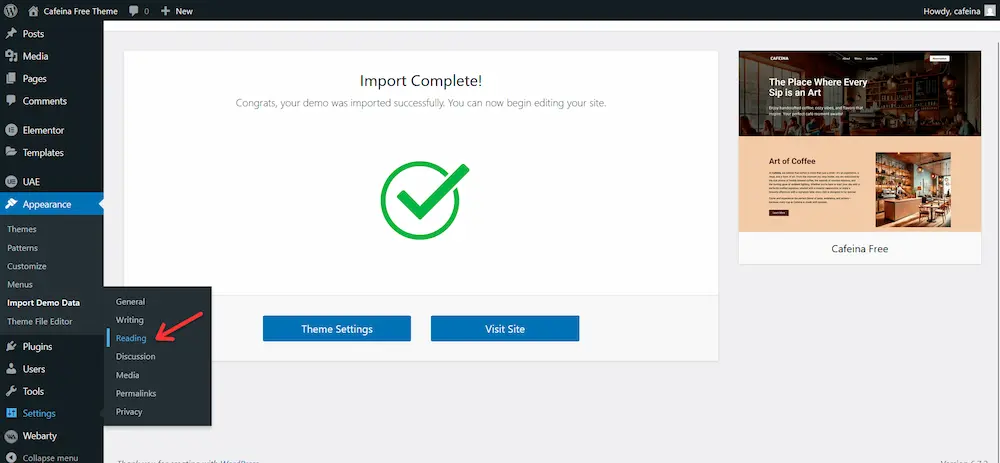
Go to Settings → Reading.
Set the Home page as the front page.
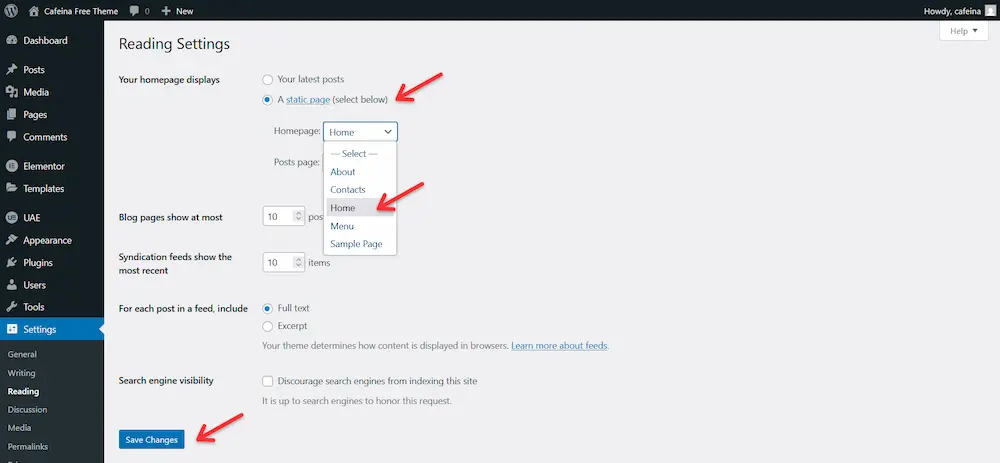
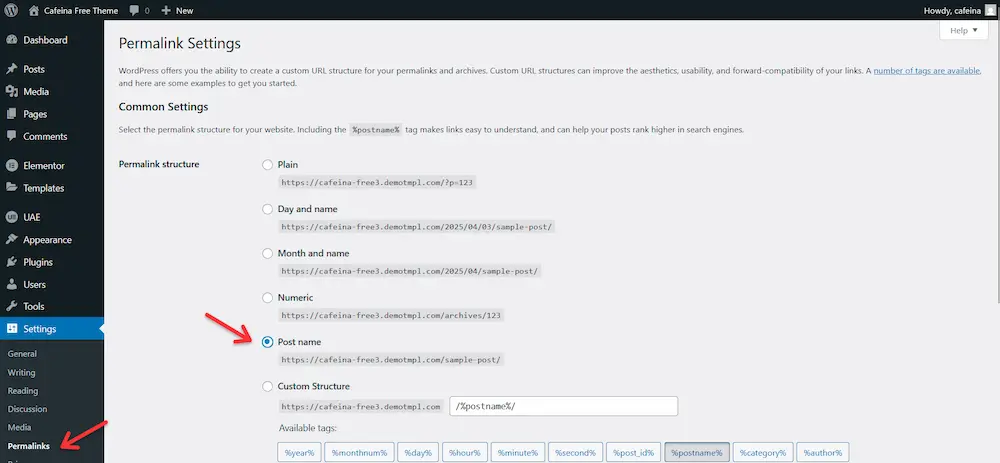
Go to Settings → Permalinks and set the Permalink Structure to “Post name”. This will make your URLs cleaner and more SEO-friendly.
10. Customizing Your Theme
Once your theme is installed and activated, follow these best practices to ensure your website functions optimally and delivers a great user experience:
- Test Website Functionality:
- Check all key features such as menus, widgets, and forms.
- Ensure your website displays properly on desktops, tablets, and mobile devices.
- Optimize Site Performance:
- Use caching plugins like WP Rocket or W3 Total Cache to improve loading speed.
- Optimize your images with tools like Smush or ShortPixel.
- Secure Your Website:
- Install a security plugin like Wordfence or Sucuri.
- Enable SSL to ensure data encryption for your visitors.
- Set Up SEO:
- Install an SEO plugin such as Yoast SEO or Rank Math.
- Optimize titles, meta descriptions, and headings for better search engine visibility.
- Backup Your Site:
- Regularly back up your website to avoid losing data.
- Use plugins like UpdraftPlus or automated hosting backups.
11. Troubleshooting Common Issues
Sometimes, installing or activating a theme can lead to unexpected problems. Here are some common issues and their solutions:
- White Screen of Death (WSOD):
- Cause: Incompatible theme or plugin conflict.
- Solution: Access your site via FTP and rename the theme folder in
/wp-content/themes/to deactivate it.
- Theme Installation Failed:
- Cause: File size limits or corrupted theme files.
- Solution: Increase PHP upload limits via your hosting dashboard or contact support.
- Missing Stylesheet Error:
- Cause: Uploading a theme that is not properly packaged.
- Solution: Ensure you upload the correct
.zipfile containing the theme folder.
- Broken Layouts or Missing Images:
- Cause: Missing demo content or plugin dependencies.
- Solution: Install and activate all recommended plugins and import the demo content if applicable.
- Slow Website Performance:
- Cause: Heavy or poorly coded themes.
- Solution: Optimize your theme and hosting settings, and use a performance plugin.
12. Frequently Asked Questions
Here are answers to some of the most common questions about installing WordPress themes:
Q1: Can I switch themes without losing content?
A: Yes, your content like posts, pages, and media will remain intact. However, theme-specific customizations, widgets, and settings may need to be reconfigured.
Q2: How do I update my WordPress theme?
A: Go to Appearance → Themes, locate the theme with an available update, and click Update Now. For premium themes, download the updated version from the vendor and upload it.
Q3: Can I customize a theme after installing it?
A: Absolutely! Use the WordPress Customizer under Appearance → Customize to adjust design elements, add widgets, and configure site settings.
Q4: What should I do if a theme breaks my website?
A: Switch to a default WordPress theme (e.g., Twenty Twenty-One) via FTP or your hosting panel to regain access.
Q5: Are free themes safe to use?
A: Free themes from the WordPress Theme Directory are generally safe. Avoid downloading themes from untrusted sources to prevent security risks.
Conclusion
By following this comprehensive guide, you’ll be able to install, activate, and optimize a WordPress theme seamlessly. Whether you’re setting up a personal blog or a professional website, choosing the right theme and adhering to best practices ensures a strong foundation for your online presence. Whether you’re using a free theme from the WordPress repository or uploading a premium design, these steps will help you get started with ease.